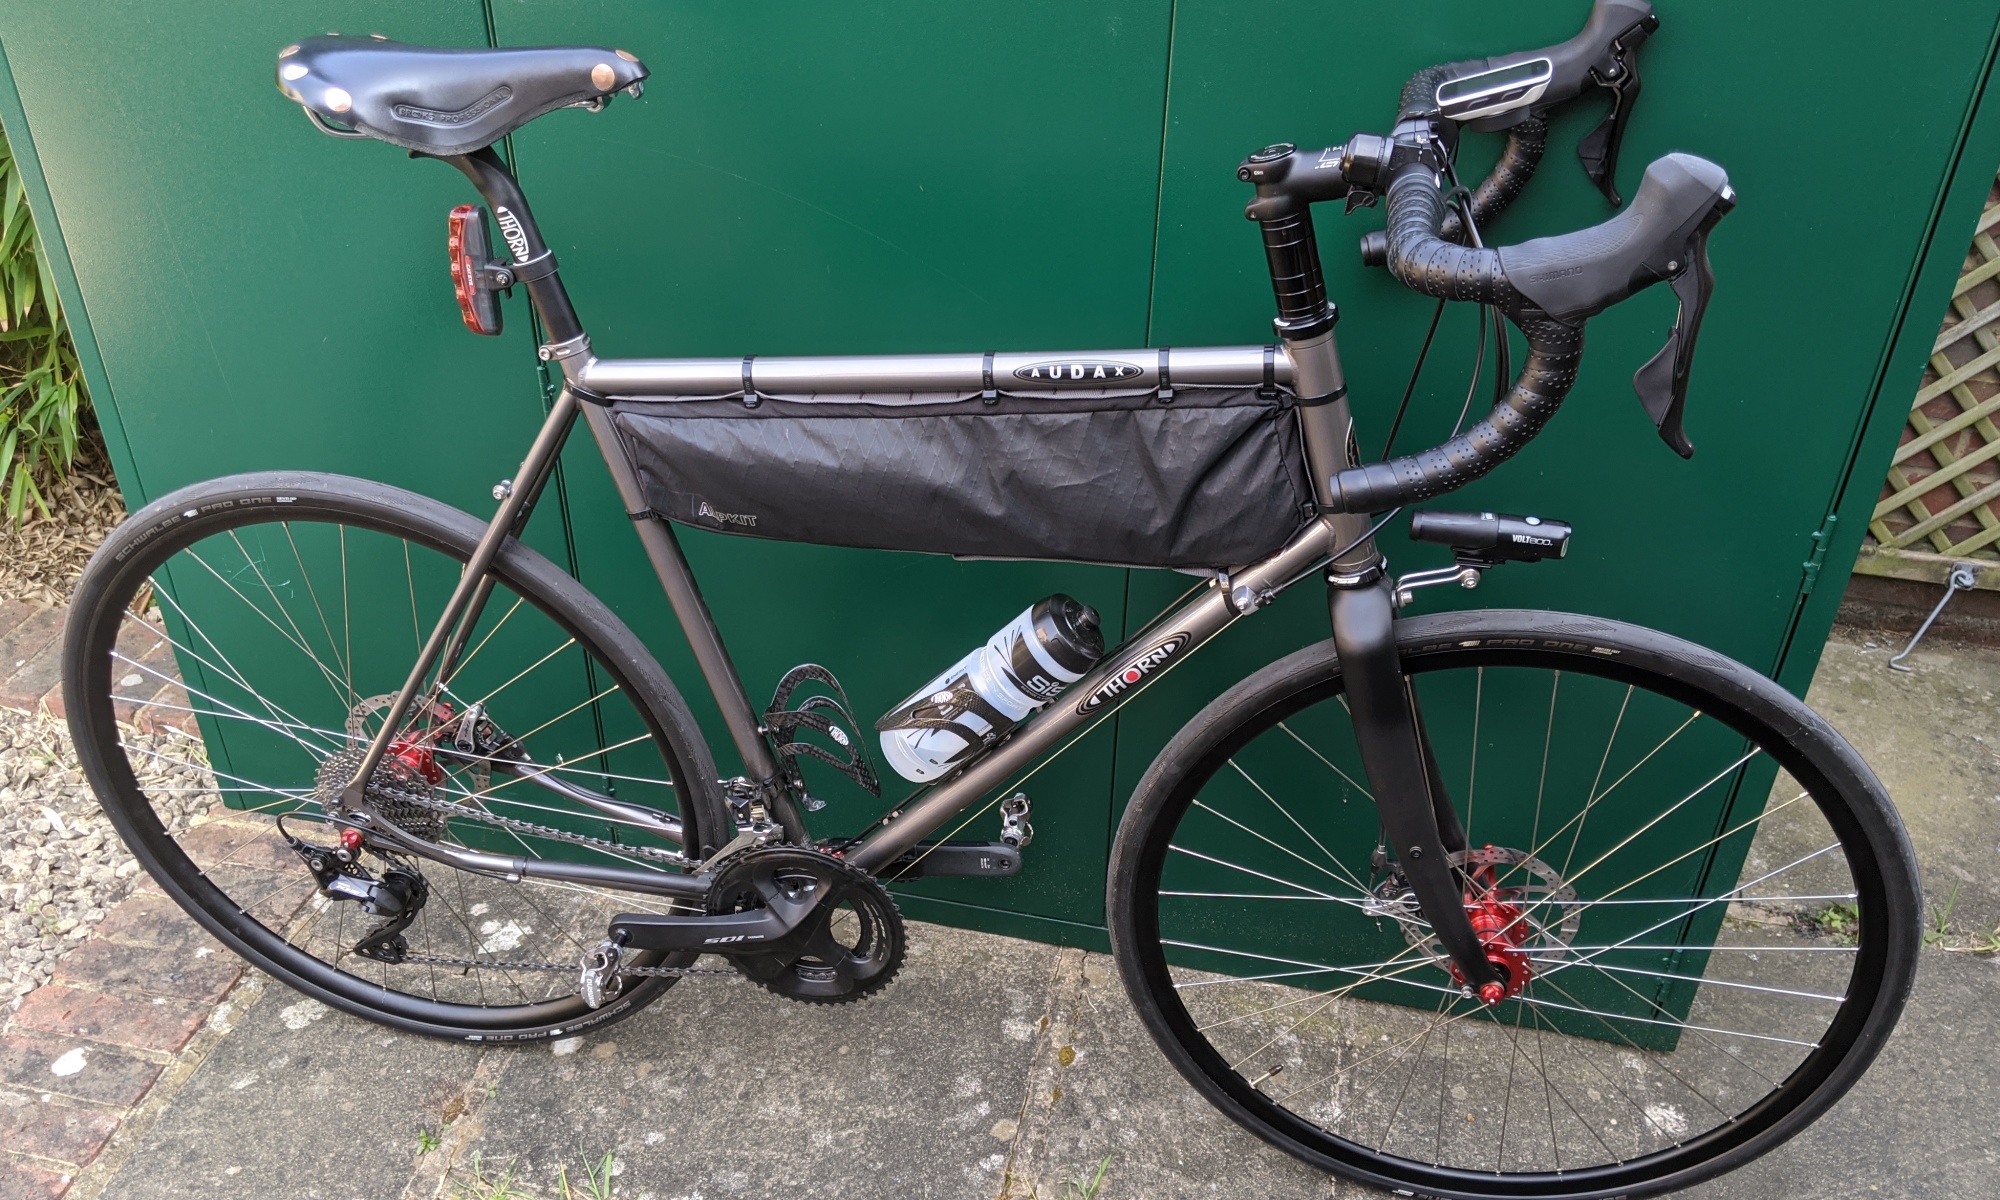
I never really fell in love with my carbon fibre Cannondale Synapse road bike after a very scary speed wobble down a steep hill at 40mph. After much research and checking of spokes, head bearings and geometry, I couldn’t launch the bike with abandon down another hill. My Thorn Sherpa inspired confidence: rock-solid handling, fully loaded down the steepest of hills and ridiculous speeds, even on rough tracks. So the Cannondale, and an unused Brompton, were consigned to eBay to fund a new bike. I wanted something for long day rides and B&B or very light camping tours. After considering a Thorn Club Tour, I settled on a Thorn Audax Mk4. Together with my Sherpa, this would cover a broad spectrum, including all my intended cycling ambitions for years.
The bike was specified with Shimano 105 transmission, a Brookes saddle, carbon fork and TRP Spyre disc brakes – held together with lovely Hope hubs and a bottom bracket. Wheels are DT Swiss RR411 asymmetric rims which can take tubeless tyres. Lastly, the build included mudguards and a light rack, plus a T-bar for a front bar bag and an Alpkit frame bag. This is its light touring configuration, these are removed to turn it into a steel framed conventional road bike.

With the glorious local weather and the pandemic lockdown curtailing any further adventures, I have stripped the bike for a summer exercise routine. The wheels came with tubeless Schwalbe G-One 30-622 tyres for winter use, that roll really well and grip like glue to slippery road surfaces. Now I use Schwalbe Pro-One tubeless, but fitting these has been a challenge.
On delivery, I discovered the tyres had been fitted with tubes, so after a few phone calls, Thorn sent me the tape, sealant and instructions for mounting tubeless. Their literature raved about the performance of tubeless tyres, run at lower pressures. Removing the G-One tyres, cleaning the rims and heating them gently with a hairdryer and applying two loops of rim tape, I added the tubeless valve. I fitted the tyre after pouting in 80ml of sealant. The tyre popped onto the rim with a reassuring click after an energetic use of a track pump. Gosh, I thought, these are easy to fit.
Come summer, I decided to fit the Pro-One tyres, as the G-One’s are not long-lasting and I wanted to start a regime of swapping the tyres each season, replacing the sealant. However, installing the tyres a second time around proved to be painful – I just could not get the tyres to inflate and ‘pop’ on to the rims.
Using inner tubes to keep me on the road, I ordered a Schwalbe air booster and some more tape. After much fiddling, I had to start from the beginning: spotlessly clean rims; new tape; carefully fitted valves and use of the new booster. It worked (eventually), and I can confirm that the results are tremendous – the difference in comfort and speed is noticeable. On the downside, the cost of tape (£25), booster (£45) and sealant (£30/litre) make this an expensive option. I hope the value of comfort and puncture protection (pinch flats and thorns) is worth it. I dare not consider a tubeless repair roadside, so I carry tyre levers, a cloth and an inner tube. It is a messy process but it will get me home.

This rigmarole is worth it. The bike handles brilliantly and is very comfortable – this comfort translates into performance, inspiring confidence and I find the bike is actually faster than the much lighter Cannondale frame (particularly down the long steep hills now :-). Imagine riding on a rough section of road that transitions to freshly laid smooth tarmac. It feels like smooth tarmac all day on tubeless.
So I am happy with the bike, now I have fettled the tyres and adjusted the geometry to perfection. The brakes could be a bit more powerful, but improve as they bed down. A Brooks saddle is curving to my form and is now as comfortable as any seat I know. The gears and bearings are silky smooth and the chain oiled with dry chain oil – which is much easier to clean.
Have I found love again? The Cannondale was a beautiful bike, but I prefer the integrity and function of the Thorn – a durable bike that will keep me happy for a lifetime.
UPDATE 1:
2,000km later and I have a puncture, but not that I knew anything about it until I got home and realised my frame had a respray – a fetching cream white, Jackson Pollock affair.

On closer inspection, a 2mm cut in the centre tread had been sealed by the Stans sealant gloop, with NO noticeable loss of pressure. So I had carried on cycling none the wiser, although anyone following me may have experienced a similar respray too.
I am not sure how long the Schwalbe Pro-One tyres will last, but I am mightily impressed with their performance, comfort and roadholding. This, together with the superb frame geometry and compliant ride, gives me the confidence to push harder – both downhill and uphill.
UPDATE 2:
3,000km in and I have had three punctures. Each time the latex gloup has done its magic and decorated my frame. Each time I have filled the tyre with a little more sealant, but now the rear tyre is looking like a pin-cushion. Another puncture today was more severe, but it got me home after cycling 30km at 25psi! Not bad at all.
It was time to remove the tyre and see what damaged has been done and perhaps consider more permanent repairs to the wider cuts, using a reverse puncture repair patch technique. What I found was a large latex ‘sausage’ (no jokes please) inside the tube and at least 5 discernible holes. The latex had hardened and the tyre no longer had any liquid sealant for future punctures. 3,000km for the rear tyre also suggested it was reaching the end of its useful life, so I ordered a new tyre.

Schwalbe have an annoying habit of renaming tyres. So the original Pro-ONE TLE tubeless tyre (HS462) has been renamed the ONE TLE and a new Pro-ONE TLE introduced (HS493). This appears to have better puncture protection, which had me thinking: why have I had so many punctures? Schwalbe rate the HS462 6/6 for protection and durability, but I score it lower. I am not riding any different roads than when I used my old clincher tubed 700C wheeled bikes and I have never had a puncture before. I conclude that sealant is essential for tubeless and without it I would score 1/6 for protection. The tyres are wearing well, but towards the end of their life, punctures have become more frequent. I am going to try the new HS493 tyres, which have a V-guard protection barrier and see how it goes. If I get punctures I think I am going to revert to tubed configurations. I think the inner tube itself provides a degree of protection too.
I haven’t drawn any final conclusions yet, but these are the pros/cons of tubeless vs tubed tyres:
| Tubeless | Tubed | |
| Rolling resistance | Fast – perhaps 5% more so | Good – adequate |
| Ride quality | Superb grip and smooth ride | Good grip and good ride |
| Durability | Performance deteriorates with use, more frequent punctures | Performance more consistent over the life of the tyre |
| Puncture protection | Punctures easily but seals well. Messy. Need to carry tube to repair | Less easy to puncture, but easy to fix. Carry spare and patches |
| Maintenance | Awkward and messy, difficult to master. Not repairable on a ride unless tube carried (unable to reseat bead without booster pump) | Straightforward and easily understood |
| Costs | Tyre more expensive, the hidden cost with sealant, rim tape and valve, plus a booster pump | Universal standard, cheaper tyre and inner tube |
I’ll update this after I have ridden the HS493s. The question will be – “Does the ride quality justify the cost and hassle of a tubeless system?”
For now my answer is “Yes”. But I am not sure this will be the case unless in a few months.

Interesting post. Thanks for sharing.
I’d be interested in a follow up detailing how you prepare a rim for tubeless.
LikeLike
Hi Nobby531,
Firstly, the rim must be tubeless compatible, the DT Swiss RR411 has a hooked rim cross-section profile. I then made sure the rim was spotlessly clean, using window glass cleaner and a micro-fibre cloth and then heated the rim with a hairdryer. This is to make sure the rim tape seals better. I used 21mm wide Notubes Stands tape originally, but now use DT Swiss 19mm tape, wrapped twice around, overlapping the valve hole three times (so start the application 10cm beyond the hole. I also wrapped in the direction of travel. Make sure the tape is tensioned as you apply it. Of course, the tyres must be tubeless too!
Secondly, I fitted the tubeless valve (I used Stans NoTubes 35mm Presta tubeless, which I prefer to the Schwalbe items). To do this, take a heated small cross head screwdriver (or similar) and melt a hole through from the outside, a small hole that will allow the valve to be pressed in and then screwed up firmly.
Thirdly, I fitted the tyre in the usual manner, noting rotation direction. Make sure the bead sits either side of the valve and around the rim well evenly, trying to pull the bead to the outside where possible. A small application of tyre fitting gel helps, but I didn’t use this first time around.
Fourth, pump the tyre up, using a track pump and booster (https://www.schwalbe.com/en/pressereader/handy-tire-booster-makes-tubeless-assembly-easier). I didn’t need the booster first time around, but it is essential I would say if the track pump doesn’t work. The tyre will eventually expand to fit the rim, with a loud pop (or two). I then pump it up to maximum (95 psi).
Lastly, I deflate the tyre, removed the valve core, and then syringe in 80ml (3oz) of tyre sealant. I used Stans Notubes sealant. Replace the valve core and rotate the wheel in your hands like a wobbly dinner plate, to coat as much of the inside of the tyre with the sealant. Insert the valve core again, firmly but not overly tight and reinflate, with a booster. You then get some leaking, but keep pumping to maximum inflation and rotate the wheel again to make sure the sealant helps to bed the beads in and seal any leak around the valve. The tyre should now stay inflated. I leave it for a few hours and then deflate to low pressure (50 psi) and ride the bike around the block. Then I inflate to optimal (I used 70 front, 80psi rear, but experiment) and then go ride.
I am not experienced with this, as a pro bike mechanic would be, but I am sure this procedure works. Try the many youtube videos too, especially the ones that focus on road tubeless. Larger sizes are much easier to fit apparently. I have had 1,000km trouble-free comfortable and fast riding trips now.
Finally, when you replace the tyre (bad puncture or otherwise), the sealant is a bit messy but washes off with water and a big rag. I carry a spare inner tube as I do not consider it possible to repair roadside tubeless. Just removed the tubeless valve and refit as normal, no rim tape needed.
Hope this helps. Ping me another note to say how you got on.
LikeLike
Thanks for the quick reply.
I’ll take that on board.
Cheers
LikeLike
I have the Thorn Audax Mk3R and am just itching to try tubeless. Thanks for the write up, it has added fire to my itch. 😉
LikeLike
Thanks, I have been seeking for information about this subject for ages and yours is the best I have discovered so far.
LikeLike
The bike review came 2nd to a review of the tires. I am just about to pull the trigger on the Audax Mark 4, I came looking for a review on the bike. All I read was your transference over to tubeless.
LikeLike
You won’t regret buying any Thorn. My Audax is used regularly: tubeless and lighter wheels make it fly as fast as a carbon bike, with extra stability and comfort. If you are of a heavier build, then steel makes sense.
LikeLike
Can you tell us more about your decision making between the Club Tour and the Audax please.
LikeLike
I had a Thorn Sherpa, so I wanted a bike at the opposite end of the spectrum, i.e. light and fast. I had a Cannondale Synapse but kept getting horrible tank slappers down steep hills. I can ride the Audax as fast with tubeless / carbon Hunt wheels will is much more stable. Most modern road bikes are for 70-80kg riders IMHO and I am much heavier. The Audax can also do light B&B touring too. If I had one bike only it would probably be a Club Tour (or another manufacturer of steel bikes like Fairlight), for all touring a road riding duties. Hope that helps.
LikeLike
Thanks for your reply, Martyn. Do you have any sense of how the Thorn Audax and Club Tour compare in terms of speed and comfort? I am thinking of buying one or the other! I will understand if you can’t answer this question. Thanks for your patience.
LikeLike
Hi Stephen,
Simply put, the CT will be able to carry more weight and be stable. The Audax will do very light B&B touring, the CT can be loaded with more to do light camping. I recommend a Sherpa/Nomad for the heavy multi-day expeditions. The Thorn Cycle website has an awesome bike bible http://www.sjscycles.com/thornpdf/thorn_mega_brochure.pdf – page 23 will help as will a call to their sales team or even a visit to Bridgewater. They will tell you the bike you need, vs the bike you want.
Martyn
LikeLike
Thank you, Martyn. I will pay them a visit.
LikeLike